
Start Here: The Light You Have, the Kit You Need, and the Food You Will Get
A north-facing balcony is the space estate agents apologise for. It gets no direct sun for most of the year, it is often cold, and it is usually full of things nobody wants to keep indoors. It is also, if you plant the right crops in it, one of the most reliable food-growing spaces in a city. This book is about that space. It covers ten crops, every one of them grown for its leaves or stems, and every one of them will give you a real harvest on a balcony the sun never crosses.
The rule that decides everything is simple. If you eat the leaf, the plant can pay for that leaf with ordinary ambient light. If you eat the fruit or the root, it cannot. A lettuce is spending as it earns: every hour of grey daylight goes straight into the next leaf, and the leaf is what you eat. A tomato is running a savings account. It has to bank enough energy to build a flower, set fruit, fill it and ripen it, and that takes direct, strong, prolonged sun. No amount of fertiliser replaces missing light. That is why there are no tomatoes in this book, and why all ten chapters that follow are about leaves.
What the harvest actually looks like
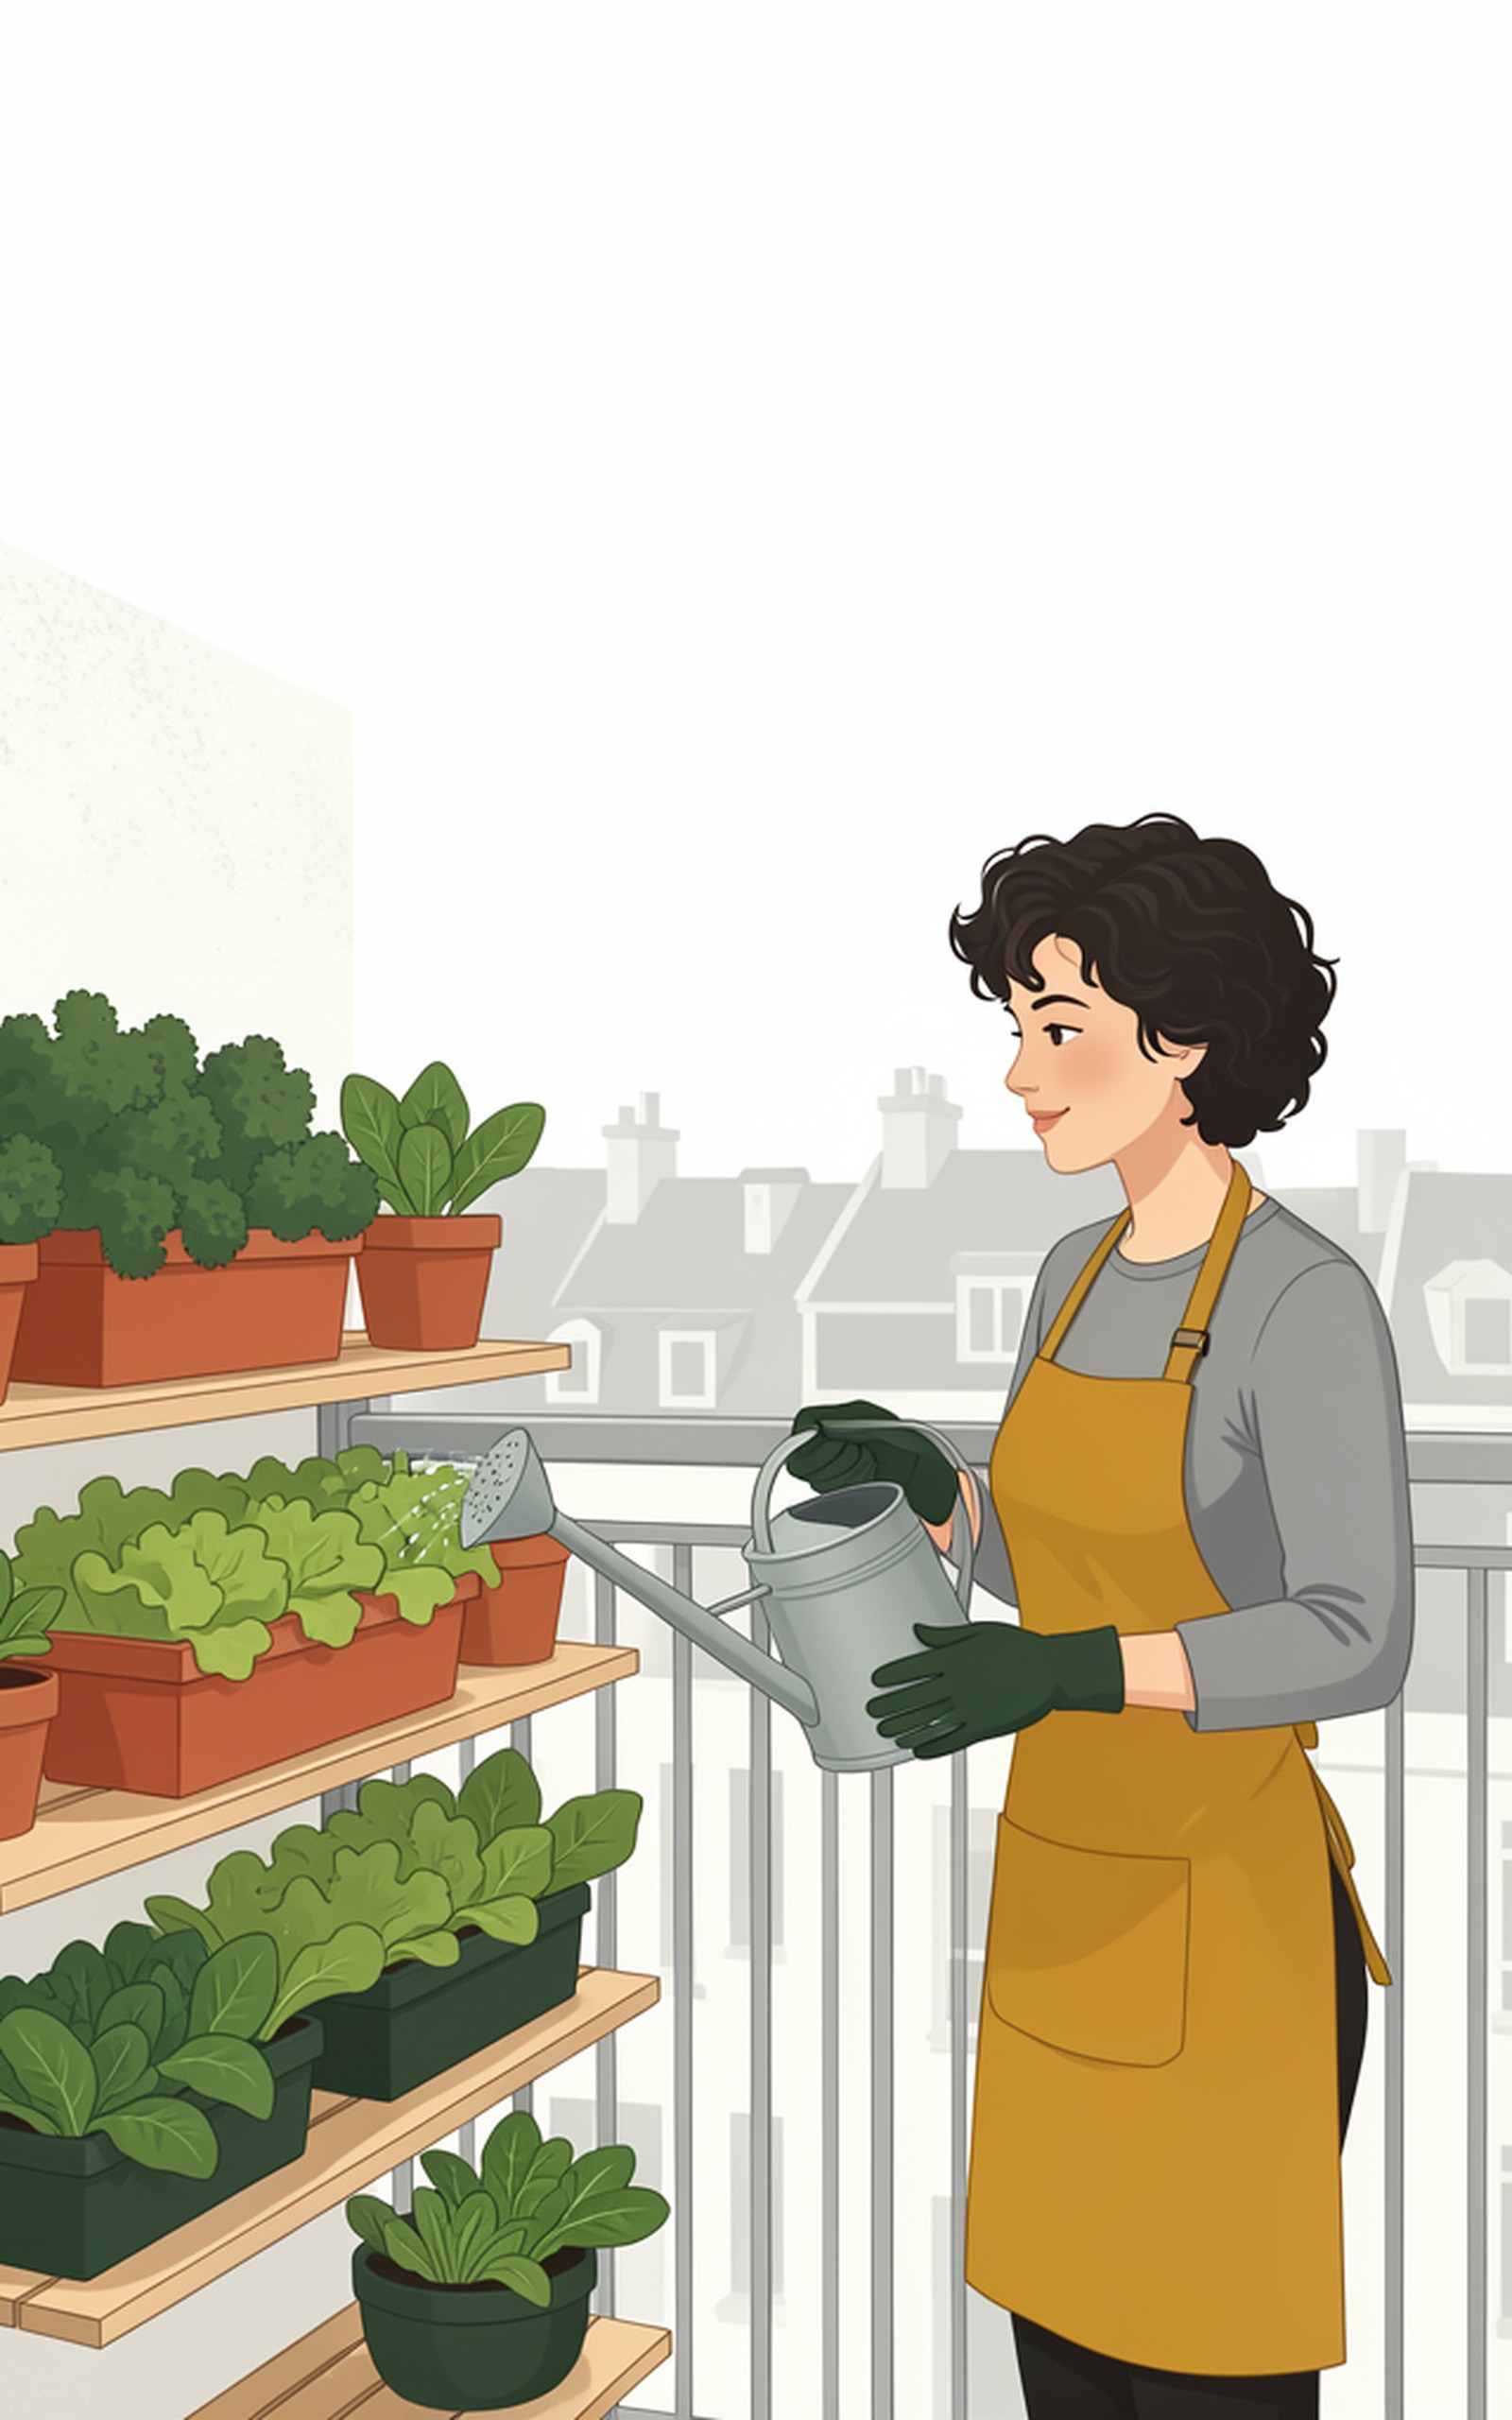
Here is an honest picture of a north balcony in its second year. Eight to ten containers sit on a low bench and a railing shelf: four window boxes of salad, one large pot of kale, one of chard, one of bok choy or mizuna, one deep pot of parsley, one of mint, and one trough of scallions. From late March to November you cut a bowl of mixed leaves every second or third day. Through the winter you pick chard, kale and parsley, and you move the mint and parsley indoors before the first hard frost.
The numbers are modest, but they are real. A single 60 cm window box of loose-leaf lettuce, cut and come again, gives roughly one to one and a half kilograms of leaves in a season if you keep picking it and keep sowing into it. Four boxes at staggered sowing dates keep that supply continuous. Add one kale and one chard plant and you have a cooked green twice a week. Add parsley, mint and scallions and you stop buying herbs entirely. That is not self-sufficiency, and no balcony this size will ever be. It is a genuine weekly harvest from about a square metre of floor, and it costs less than the same salad at the supermarket.
The north balcony feeds you salads and herbs, not dinners. That is worth having.
What you will not be growing
Be clear about this before you spend any money. The following crops will not give you anything worth eating on a balcony with no direct sun. They will germinate, they will look reasonable for a few weeks, and then they will stall.
- Tomatoes, peppers, cucumbers, courgettes and other squashes, aubergine, beans and peas grown for their pods, sweetcorn, melons and strawberries.
- Any crop where the root or the bulb is the point: carrots, beetroot, radishes, onions grown for bulbs, garlic and potatoes.
Expect small fruit that never ripens, roots the size of a pencil, and bulbs that stay the size of a pea. Grow those somewhere else, and use this balcony for the crops that come before and after them on the plate.
Read your light before you buy anything
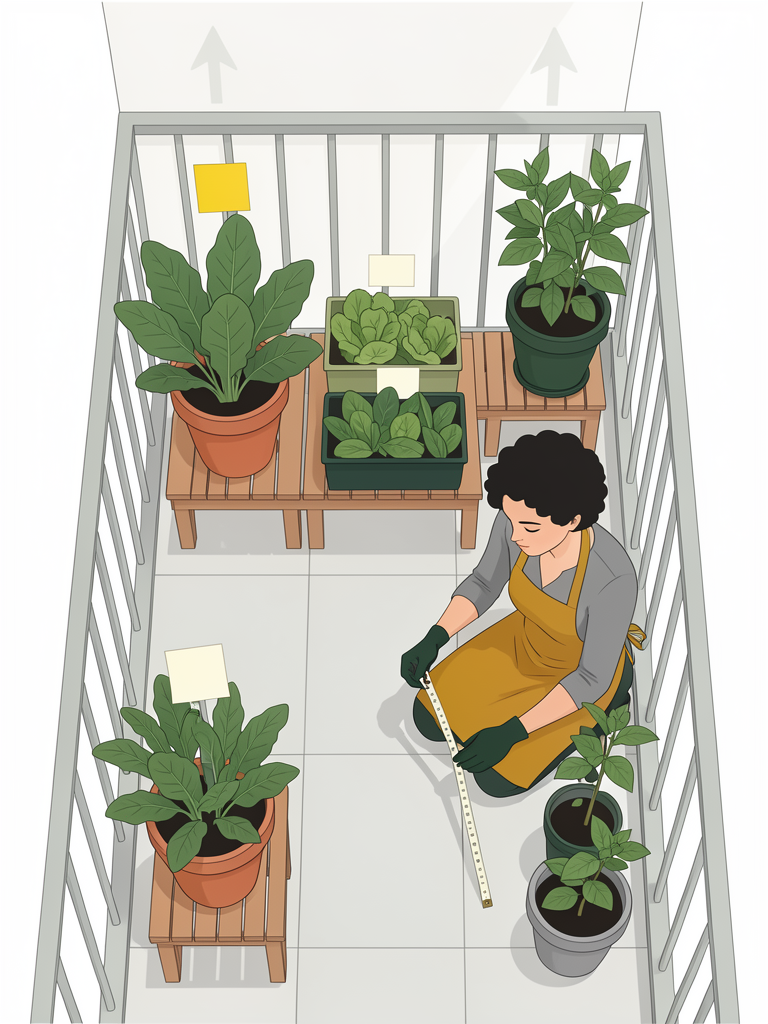
Do not skip this section. The most common failure on a north balcony is not pests or disease. It is a gardener who has convinced themselves their balcony is brighter than it is, and has planted accordingly. You need one clear day, one overcast day, and about twenty minutes on each. The tools are a free light meter app on your phone, a notebook, a white index card, a pencil, a bamboo cane, sticky tape, a tape measure, and a newspaper.
- Clear day, four readings. Tool: light meter app and notebook. Measure at the height the leaves will sit, not at floor level. Take a reading at roughly 9:00, 12:00, 15:00 and 18:00, and write each one down with its time.
- Overcast day, the same four readings. Tool: the same app and notebook. Keep the two sets of numbers separate. The overcast set is the one that describes most of your year.
- The shadow test. Tool: a white index card, sticky tape, a pencil and a bamboo cane. Tape the card flat to the railing or the wall. At each of the four times, hold the cane upright beside the card and trace the edge of its shadow with the pencil. If you trace nothing at all, you have just discovered what this book is for.
- The photo survey. Tool: your phone camera. Stand in the same spot at each of the four times and photograph the balcony. At the end of the day, look at the four pictures side by side. They will show you something the numbers cannot: where the light actually lands, and how it moves.
- The newspaper test. Tool: a newspaper. Stand where the pots will go, at pot height, with no lights on and no phone screen lit. If you can read the small print comfortably, you have enough light for lettuce, spinach, kale and chard. If you can read headlines but the small print is hard, you are at the level of arugula, mizuna and parsley. If you cannot read the paper at all, only mint will grow there, and only just.
- Hunt for borrowed light. Tool: a tape measure. Walk the balcony and find every pale surface within two metres: your own wall, the concrete underside of the balcony above, a pale building opposite, a white door. A white wall within a metre of a pot is worth a surprising amount of reflected light. Note the best of them.
- Raise the pots. Tool: a low bench, a two-step stool, shelf brackets, or a railing planter. Light falls away steeply as you move back and down from the opening. Lifting a pot by 30 cm, or moving it 30 cm closer to the railing, makes a measurable difference. This is the cheapest improvement available to you.
- Clean the glass and open the door. Tool: a cloth and a bucket of warm water. Dirty glazing can cut the light by ten to twenty per cent. If the balcony is glazed, wash the inside of the glass at the start of every season and leave the doors open whenever the weather allows.
- Add one reflector. Tool: a sheet of white foam board, or cardboard covered in kitchen foil, and two bricks. Stand it behind the pots, tilted slightly towards them, so it bounces light from the opening back onto the leaves. One board behind the salad boxes is enough to see the difference.
Mark three zones
With your numbers, your shadow tracings and your four photographs in front of you, divide the balcony into three zones and mark each one with a sticky note or a chalk line. Then plant by zone, not by wish.
- Zone A, your brightest spot, usually at the railing end or right against the opening: kale, chard, bok choy.
- Zone B, the middle: lettuce, spinach, arugula, mizuna, parsley, scallions.
- Zone C, the dark corner by the wall: mint. If a spot is too dark even for mint, do not plant it. Put a mirror or a white board there instead, and give that light to Zone B.
The kit
You need less than you think, but you do need all of it. Buy once, at the start, and the whole set lasts several seasons.
- Containers, 15 to 30 cm deep, every one with drainage holes, and a saucer for each. Window boxes, ordinary pots, or food-grade buckets with holes drilled in the base. Never a sealed decorative pot: roots on a north balcony drown far more often than they dry out.
- Pot feet or broken tiles, to lift each pot one or two centimetres off the ground so water drains and air moves underneath.
- Soilless potting mix, about 65 per cent of your total volume. Not garden soil, which compacts in a pot and carries weeds and disease.
- Finished compost, about 25 per cent.
- Perlite, about 10 per cent, for drainage and air around the roots.
- A slow-release organic fertiliser, roughly 4-4-4, mixed into the medium at half the rate on the label. Shade plants grow more slowly and use less food, and full strength in low light produces soft, pale, pest-prone growth.
- A bottle of liquid seaweed or kelp, for a tonic every two or three weeks through the growing season.
- A watering can with a fine rose, and a two-litre jug for bottom watering.
- Snips or sharp scissors, and a bowl to cut into.
- Sticky yellow traps, and a spray bottle with a squirt of washing-up liquid in water for aphids.
- A maximum-minimum thermometer. On a north balcony, soil temperature decides whether seed germinates at all.
- Plant labels and a pencil. Pencil survives watering; marker pen does not.
- A notebook, for the sowing dates you will otherwise forget.
A full set-up for eight containers, seed included, usually costs about the same as two or three weeks of supermarket salad. From the second year onwards you are buying seed and potting mix, and nothing else.
How to use this book
There are ten chapters and ten crops. Each chapter has one job, and each follows the same five parts: what you need, the steps, the watering rhythm, the harvest, and what failure looks like. Read the failure section before you plant, not after. It tells you what the crop looks like when something is going wrong, which is the only way to catch a problem while it can still be fixed.
One last warning before the first chapter. The watering rhythm of a north balcony is not the watering rhythm of a sunny garden. In shade the container dries more slowly, the plant drinks more slowly, and the classic summer mistake of underwatering is usually replaced by the quieter and more deadly mistake of overwatering. Check the soil with your finger before you water, every single time, until you know each pot by its weight.
All measurements are given in centimetres first, with inches in brackets. Temperatures are in Celsius. Sowing dates assume a temperate climate in the northern hemisphere with a frost between November and March. Shift everything by six months if you garden south of the equator.
Chapter 1: Loose-Leaf Lettuce
Loose-leaf lettuce is the crop that makes a north balcony worth having. It is the fastest thing in this book, it is the cheapest, and it is the only one you can start harvesting four weeks after sowing. It is also the crop that suits shade best, because it never has to build a heart. Iceberg and cos types have to pack a tight ball of leaves in the middle, and that takes light. Loose-leaf types simply keep making new leaves from the centre for as long as you keep cutting the old ones off. Grow the loose-leaf and cut-and-come-again types, and forget the rest.
What you need
- One 60 cm window box at least 15 cm deep, with drainage holes and a saucer. That box holds four to six plants. Alternatively, four 15 cm pots.
- Soilless potting mix, about 65 per cent of the volume.
- Finished compost, about 25 per cent.
- Perlite, about 10 per cent.
- Slow-release organic fertiliser, roughly 4-4-4, mixed in at half the rate on the label.
- A pinch of loose-leaf lettuce seed. Salad Bowl, Red Sails, Sylvia, or any cut-and-come-again mix.
- A pencil, a plant label, a spray bottle, a jug, and a pair of small scissors.
The steps
Lettuce seed needs light to germinate. If you bury it, you will wait three weeks and get nothing. Sow it on the surface and press it in.
- Mix the potting mix, compost, perlite and fertiliser in a bucket. Tool: a bucket and your hands. Fill the box to 2 cm below the rim.
- Water the box with the jug until water runs out of the drainage holes, then leave it to drain for an hour. Tool: a jug. The mix should be damp all the way through, not wet.
- Scatter the seed thinly over the surface, aiming for one seed every two or three centimetres. Tool: the seed packet, tapped gently. Never tip the whole packet out.
- Press the seed into the surface with the flat of your hand, or dust over it with no more than 3 mm of dry mix. Tool: your hand.
- Label the box with the variety and the date. Tool: a pencil and a plant label. A pencil survives watering; most marker pens do not.
- Keep the surface damp for the next seven to fourteen days. Tool: a spray bottle, not a watering can. A full can will wash every seed into one corner.
- When the seedlings have two true leaves, thin them to 20 cm apart. Tool: small scissors. Cut the extras at soil level rather than pulling them, because pulling disturbs the roots of the plants you are keeping. Eat the thinnings.
The watering rhythm
On a north balcony the sun does not dry the pot, so your risk is the opposite of a sunny garden. Water when the top 2 cm of mix is dry, and check that with your finger rather than your eyes. In spring and autumn that is usually every second or third day. In a warm July it is every day, because the plants are bigger. Water in the morning, at the base, with the rose on the can.
Bottom watering suits lettuce better than any other method. Stand the box in a tray with 2 cm of water for twenty minutes, then empty the tray. Never leave the box sitting in water. A pot standing in a full saucer in cool shade is the fastest way to rot the crown of the plant.
The harvest
- Start cutting when the leaves are 10 cm long, usually 28 to 35 days from sowing.
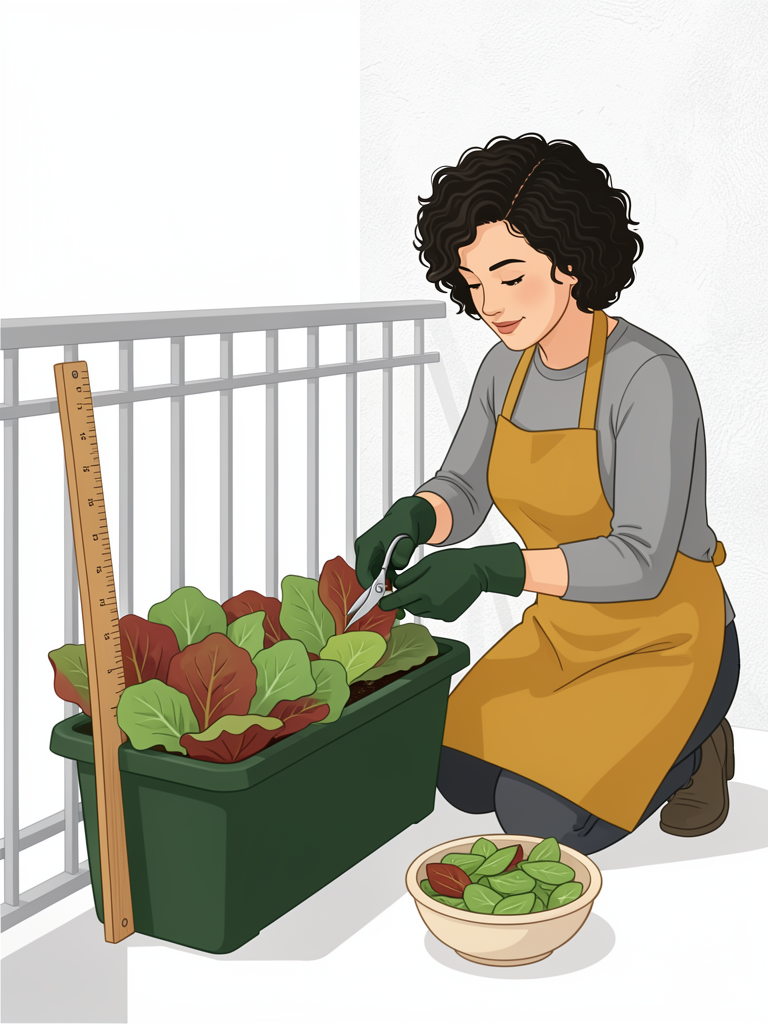
- Take the outer leaves first, one at a time, with snips, leaving the centre to keep growing. A well-picked plant gives you leaves for six to eight weeks.
- Alternatively, cut the whole plant 3 cm above the crown and it will send a second, smaller head.
- Cut in the cool of the morning, wash the leaves in cold water, and spin them dry. Wet leaves in the fridge turn to slime within a day.
- Sow a new box every three weeks from March to September. Lettuce that is left in the ground too long turns bitter, and succession sowing is the only cure.
What failure looks like
- Seedlings that are pale, thin and 6 cm tall with leaves only at the very top: not enough light from the day they sprouted. Move the box, or harvest earlier and treat them as baby leaves. No fertiliser will fix this.
- Brown, papery edges on otherwise healthy leaves, which growers call tipburn: the plant could not move calcium to the leaf edges because the watering was uneven. It is not a disease. Water more evenly, bottom water, and stop feeding.
- A tall stalk rising from the middle with small flowers and bitter leaves: the plant has bolted. This is caused by heat, not by shade, and it usually happens in a July hot spell. Pull it, eat what is left, sow again.
- A brown, mushy patch at the base of the plant with a sour smell: crown rot. The mix stayed wet for too long. Empty the saucer, water less, and start again in fresh mix with more perlite.
- Small sticky clusters in the fold of the newest leaves: aphids. Wash them off with a soapy spray and repeat every three days, because the eggs hatch faster than you expect.
- Nothing at all after three weeks: the seed was buried, or the surface dried out. Resow and check the depth.
Chapter 2: Spinach
Spinach is the crop that rewards a north balcony most, and also the one that punishes impatience. It is a cool-season plant that sulks in heat, runs to seed the moment it is stressed, and refuses to germinate at all above about 24 C. Give it a cool shaded balcony, a deep pot and a late-summer sowing, and it will give you the best leaves in this book. It is also the crop most likely to be ruined by a single dry afternoon, so read the watering section twice.
What you need
- One 25 cm deep pot for two plants, or a 60 cm window box at the same depth for four. Depth matters more than width: spinach has a taproot and it wants to go straight down.
- Soilless potting mix, 60 per cent; finished compost, 30 per cent; perlite, 10 per cent.
- A handful of garden lime or crushed eggshell if your mix is peat-based. Spinach sulks below pH 6.5.
- Slow-release organic fertiliser, at half the label rate.
- Spinach seed. Bloomsdale, Winter Giant and Perpetual are all reliable.
- A small bowl of lukewarm water for soaking, a pencil, a spray bottle, scissors, a jug, and a maximum-minimum thermometer.
The steps
Spinach seed will not germinate well above 24 C. If you sow it in the heat of midsummer, you will get a patchy, disappointing row and you will blame the seed. Sow in early spring, and again, better still, in late summer for an autumn and winter crop.
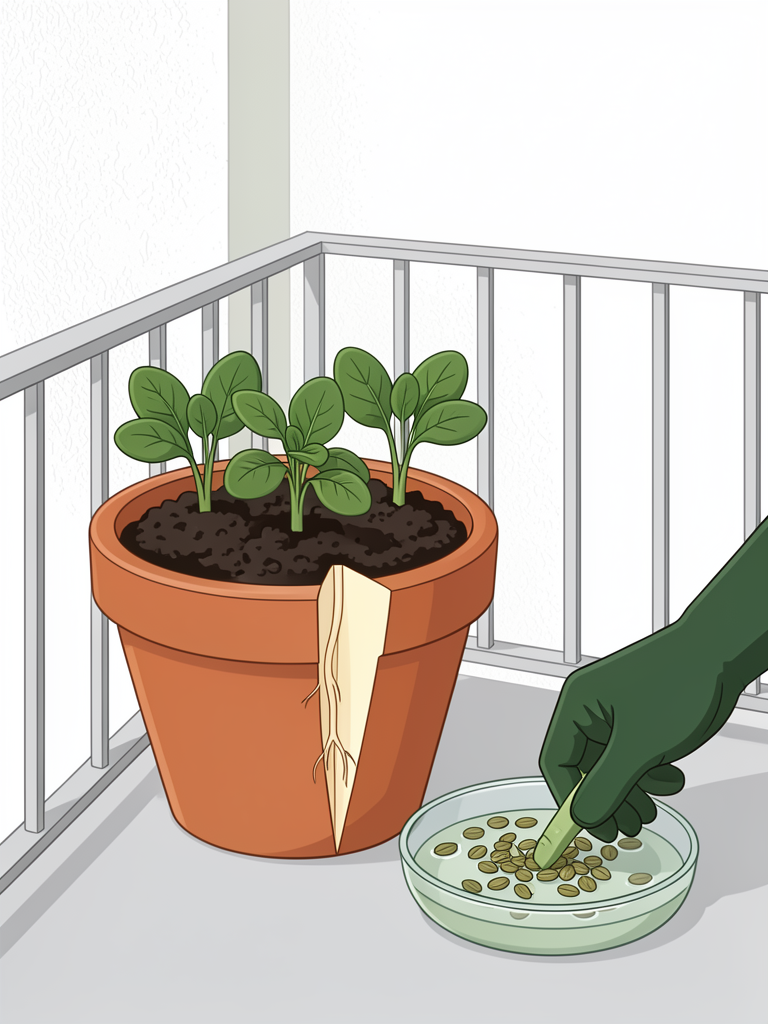
- Soak the seed overnight in a small bowl of lukewarm water. Tool: a bowl. Twelve hours is enough; more than a day and the seed starts to rot.
- Fill the pot to 2 cm below the rim with the mixed medium. Tool: a bucket and your hands. Water it thoroughly with the jug and let it drain.
- Sow 1 cm deep and 8 cm apart. Tool: the end of a pencil to make the holes, and your fingers to close them.
- Label the pot and mist the surface. Tool: a pencil, a label and a spray bottle. A gentle mist will not displace the seed; a watering can will.
- Keep the surface damp and the mix between 15 and 20 C. Germination takes five to ten days. Tool: a maximum-minimum thermometer, so you know what actually happened overnight.
- Thin to one plant every 8 cm when the seedlings are 5 cm tall. Tool: scissors. Cut at soil level; pulling disturbs the neighbours.
- Feed with liquid seaweed every two weeks once the plants have four true leaves. Tool: a watering can.
The watering rhythm
Spinach wants even moisture, never dry and never soggy. Water in the morning at the base. In a cool spring that is every second day; in a warm spell, check the pot every morning, because a spinach plant that dries out for one afternoon will start to run to seed within days. Never water spinach over the leaves in the evening. Still, wet leaves in a shaded corner are exactly what downy mildew needs.
The harvest
- Baby leaves are ready at 30 to 35 days; full-sized leaves at about 45 days.
- Take the outer leaves first, cutting them at the base with scissors and leaving at least four leaves in the centre.
- Alternatively, cut the whole plant 2 cm above the crown and it will give you one or two more cuttings.
- Never take more than a third of the plant at once, or it will stop growing and start flowering.
- Sow again every three weeks through spring, and then from late August onwards, which is when spinach does best on a north balcony.
What failure looks like
- Arrow-shaped leaves, a tall central stalk, small flowers and bitter leaves: the plant has bolted, usually from heat or from a pot that dried out even once. Pull it and resow in a cooler month.
- Yellow patches on the upper surface of a leaf with a grey-purple fuzz underneath: downy mildew. This is the classic spinach disease in still, damp shade. Thin the plants, water only at the base, remove the affected leaves and improve the airflow.
- Seedlings collapsing at soil level with a pinched, withered stem: damping off, caused by cold wet mix and no air movement. Sow thinner, water less, and open the balcony door.
- Pale leaves yellowing from the bottom upwards: the mix is spent. Feed with liquid seaweed; if that does not fix it within two weeks, tip the plants out and start with fresh mix.
- Pale papery blotches wandering across a leaf: leaf miner. Squash the small grub at the end of the trail between thumb and finger, or simply remove the leaf.
- Leaves that stay small, thick and dark green no matter how much you water: the pot is too shallow and the taproot has hit the base. Use a deeper pot.
Chapter 3: Arugula
Arugula, also called rocket, is the fastest crop in this book and the one that keeps a north balcony productive while everything else is still getting going. It goes from seed to a cuttable leaf in three weeks, it grows happily in a shallow container, and it can be sown in a fresh pot every fortnight for a continuous supply from March to November. Its one requirement is that you resist the urge to feed it.
What you need
- A 15 cm deep pot of 12 cm diameter for each plant, or a 60 cm window box for six plants. Arugula is shallow-rooted and does not need depth.
- A lean mix: soilless potting mix, 60 per cent; compost, 20 per cent; perlite, 20 per cent.
- Slow-release fertiliser at a quarter of the label rate, or none at all.
- Arugula seed. Sow a fresh pot every two to three weeks.
- A spray bottle, a plant label, a pencil, a jug and scissors.
The steps
Arugula is the one salad crop that gets worse with kindness. A rich, heavily fed mix in low light gives you soft, floppy, almost tasteless leaves, and aphids find those leaves irresistible. Feed it lightly or not at all, and let it grow steadily.
- Fill the container with the mixed medium, firm it gently with your hand, water it with the jug, and let it drain.
- Sow 5 mm deep, about 2 cm apart. It is fine to broadcast the seed over the surface and cover it with a light dusting of mix. Tool: your hand and a little dry mix.
- Label the pot with the variety and the date. Tool: a pencil and a plant label.
- Mist the surface and keep it damp. Tool: a spray bottle. Germination takes three to seven days.
- Begin cutting when the leaves are 8 to 10 cm tall, which is 21 to 28 days from sowing. Tool: scissors.
- Sow a new pot every two to three weeks from March to October. Arugula that is left to get old turns woody and ferociously hot.
The watering rhythm
Moderate and even. Let the top centimetre of mix dry between waterings, then water at the base until it just runs through. Arugula tolerates a dry pot better than lettuce or spinach, but a plant that has been stressed produces small, tough, painfully peppery leaves. Water in the morning. In cool weather that is every second or third day; in summer, every day.
The harvest
- Baby leaves at 21 days, larger leaves at 28 to 35 days.
- Cut 2 cm above the crown with scissors and the plant will give you two or three more cuttings.
- If a plant bolts in a heatwave, eat the flowers. They are peppery and they are good scattered over a salad.
- Never let a plant stand for more than about six weeks. Old arugula is tough, hollow-stemmed and unpleasant.
What failure looks like
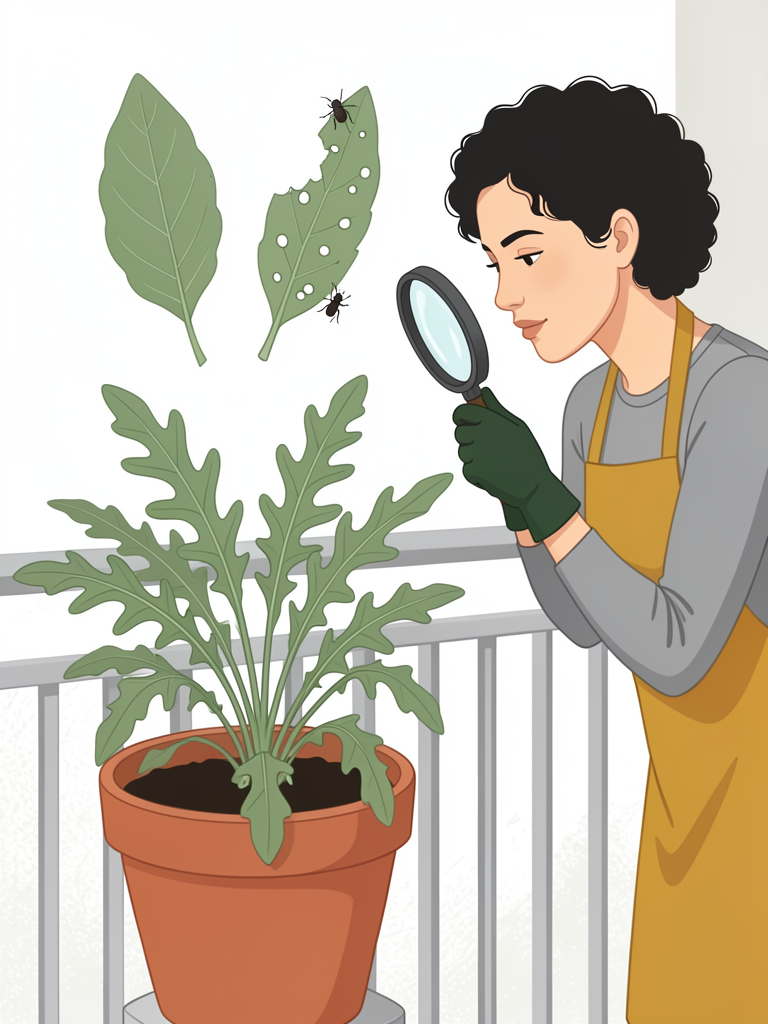
- Small round shot holes scattered across otherwise healthy leaves: flea beetles. The damage is cosmetic if the plant is growing strongly, but you can cover the container with fine mesh if it gets bad.
- A tall stalk with white flowers two weeks after sowing: the plant has bolted in a heatwave. Cut the stalk, eat it, and resow in a cooler month.
- Leaves so peppery they are unpleasant to eat: drought stress or an old plant. Water more evenly, and sow fresh rather than trying to rescue it.
- Rot at the base of the plant and a sour smell: the container is too wet and too dark. Water less and move the pot into Zone B.
- Nothing comes up at all: the seed was buried too deep, or the surface dried out. Arugula is normally up in three days, so if you are a week in, resow.
- Soft, pale, tasteless leaves: too much nitrogen in low light. Stop feeding entirely for the rest of the crop.
Chapter 4: Kale
Kale is the most productive single plant you can put on a north balcony. One plant in one large pot will give you leaves for eight or nine months, keeps producing through the winter, and actually tastes better after a frost. It is also the crop that most rewards being placed in your brightest zone, because it is the largest and hungriest plant in this book. Give it room, give it the best spot you have, and it will repay you.
What you need
- One pot per plant: 30 cm across and 30 cm deep, or a ten-litre container. Dwarf varieties will manage in slightly less, but kale is a big plant and crowded roots stop it dead.
- Soilless potting mix, 50 per cent; finished compost, 30 per cent; perlite, 20 per cent.
- Slow-release organic fertiliser at half rate, plus liquid seaweed every fortnight.
- Kale seed or transplants. Dwarf Curly Scarlet, Red Russian, and Nero di Toscana all work well in containers.
- A saucer, pot feet, a trowel, a jug, scissors, and a watering can.
The steps
Kale hates being planted too deep and hates a disturbed root ball. Set it into its final pot at the same level it was growing before, and never bury the stem.
- Sow the seed 1 cm deep in a small pot, two seeds per pot. Tool: a small pot and a pencil to make the hole.
- Germinate at 15 to 21 C in five to eight days. Tool: a maximum-minimum thermometer.
- Move the seedling into its final pot when it has four true leaves. Water the final pot first, then firm the mix gently around the roots. Tool: a trowel.
- Water it in with the jug and leave the pot to drain completely. Tool: a jug.
- Keep one plant per pot. Tool: a tape measure. Two kale plants in a ten-litre pot will both be stunted by midsummer.
- Feed at half strength every two weeks with liquid seaweed. Tool: a watering can. In shade, half strength is the full dose.
- Mulch the surface with 2 cm of compost after two months. Tool: a handful of compost. It keeps moisture even and stops the surface panning hard.
The watering rhythm
Deep and less often. Let the top 3 cm of mix dry before you water again, then water until it runs from the base. A ten-litre pot in cool weather may only need water every three or four days, and in summer every day or two. Water at the base in the morning, never over the leaves, and empty the saucer twenty minutes later. Kale in cool shade with permanently wet roots is the single most common way this crop fails.
The harvest
- Start taking outer leaves when the plant is 25 cm tall, usually eight to ten weeks from sowing.
- Pull the lowest leaves downwards and sideways, not upwards. Tool: your hand. An upward tug tears the stem.
- Never take more than a third of the leaves at once, and always leave at least six on the plant.
- Keep harvesting through the winter. Frost sweetens kale; a hard freeze will not kill it.
- In spring the plant will try to flower. Cut the flower shoots and eat them like a slender broccoli. Tool: scissors.
What failure looks like
- One thin bare stem with a small tuft of leaves at the very top: the plant has not had enough light for months. Move it to Zone A, or start again. Feeding it will not help.
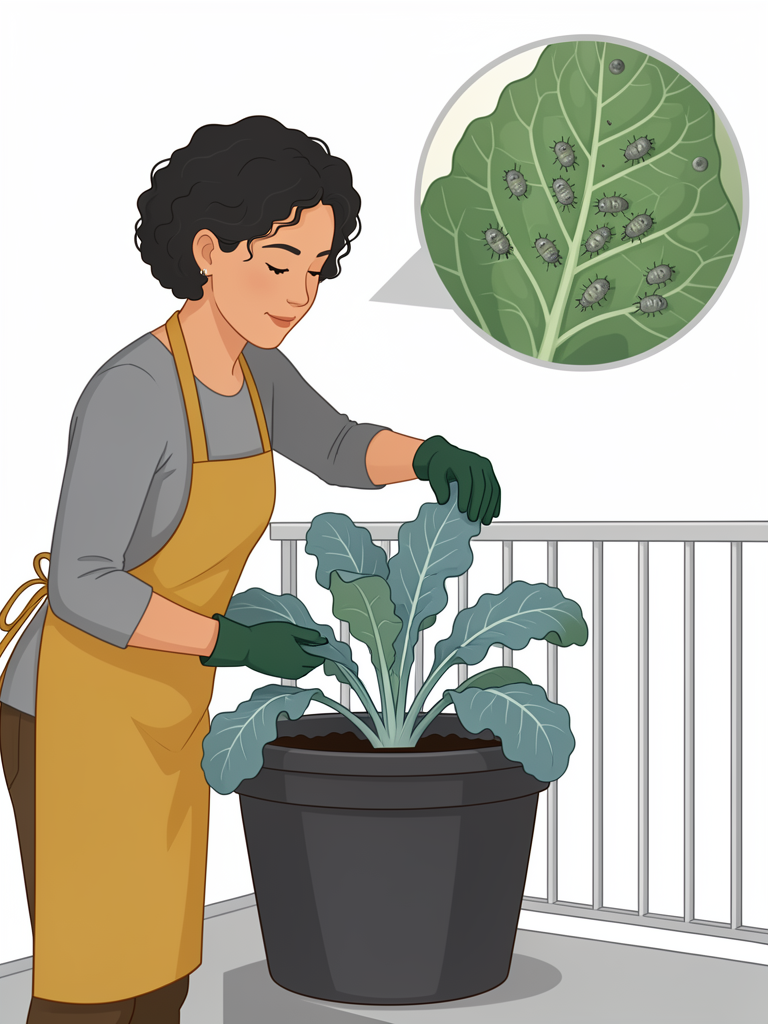
- Grey-green aphid clusters packed into the crinkles of the leaves: the classic kale failure on a shade balcony. Spray with soapy water, repeat every three days, and check every leaf before you carry it indoors.
- Pale yellow older leaves: nitrogen hunger, especially after two months in the same pot. Feed with liquid seaweed.
- Brown mushy roots and a sour smell when you tip the plant out: overwatering in a cold dim pot. Repot into fresh mix with extra perlite.
- Holes chewed from the leaf edges: caterpillars. Pick them off by hand; there is no spray needed for a single balcony plant.
- A blue-grey bloom on the leaves with no new growth at all for weeks: root rot or root aphid. Tip the plant out and inspect the roots before you waste more time on it.
Chapter 5: Swiss Chard
Swiss chard is the workhorse of the shade garden. It gives the largest leaves of any crop in this book, it is far more forgiving of a missed watering than spinach, and a single plant will keep producing for twelve to eighteen months if you feed it. Rainbow and Bright Lights types also happen to be the most decorative thing you can put on a north balcony, which matters more than you might think when the balcony is the only outdoor space you have.
What you need
- One 30 cm deep pot per plant, 28 cm across. Chard is a large plant and its leaves need room to fan out.
- Soilless potting mix, 50 per cent; finished compost, 30 per cent; perlite, 20 per cent.
- A teaspoon of dolomitic lime in the mix, or a box of Epsom salts kept to one side. Chard in containers very often runs short of magnesium.
- Slow-release organic fertiliser at half rate, plus liquid seaweed every two weeks.
- Chard seed. Bright Lights and Fordhook Giant are both dependable in shade.
- A jug, scissors, a pencil, a label, and a handful of compost for mulching.
The steps
Chard seed is not a single seed. Each corky cluster holds two or three seeds, so a sowing that looks correctly spaced will give you clumps of three seedlings fighting each other for the same patch of soil. Expect it, and thin hard.
- Fill the pot with the mixed medium and water it with the jug. Let it drain.
- Sow 1.5 cm deep, 25 cm apart. Two clusters per 30 cm pot. Tool: a pencil to make the holes and your fingers to close them.
- Keep the pot at 18 to 24 C and damp. Germination takes five to ten days. Tool: a maximum-minimum thermometer.
- When the seedlings are 5 cm tall, thin to the strongest one at each station. Tool: scissors. Cut the others off at soil level; pulling will disturb the one you are keeping.
- Feed with liquid seaweed every two weeks from the moment the plant has six leaves. Tool: a watering can.
- After six weeks, spread 2 cm of compost over the surface of the pot. Tool: your hands. It keeps the moisture even and the roots cool, which is the whole advantage of a shaded balcony.
The watering rhythm
Deep and even. Chard forgives a dry spell that would ruin spinach, but the leaves turn tough and stringy if it is repeatedly stressed. Water until it runs from the base, then wait until the top 3 cm of mix is dry. In cool shaded conditions that is every three to five days. Water at the base in the morning: wet leaves in still air are how leaf spot starts.
The harvest
- Start when the plant has eight to ten leaves, usually eight to ten weeks from sowing.
- Cut the outer leaves at the base with scissors, and always leave at least five leaves in the centre. Tool: scissors.
- One plant will keep producing for twelve to eighteen months if you keep feeding it. This is the best value in the book.
- In cold weather the plant stops growing but it survives. It will restart on its own in spring.
- Cut the stems separately from the leaves. The stems need two or three minutes more cooking.
What failure looks like
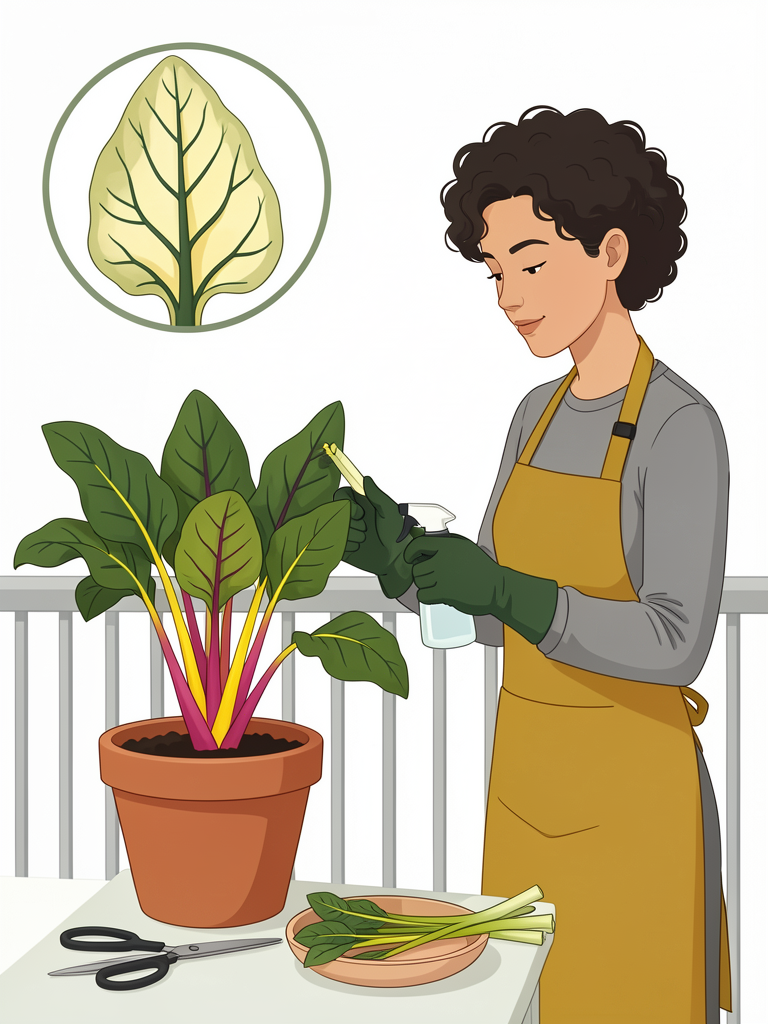
- Yellow patches between the veins on the older leaves while the veins stay green: magnesium shortage, which is very common in peat-based container mixes. Spray the leaves with Epsom salts at one teaspoon per litre of water in the evening, and repeat in a fortnight.
- Blotchy, papery white tunnels running across a leaf: leaf miner. Squash the small grub at the end of the tunnel with your thumb, or cut the leaf off.
- Small brown spots spreading into papery patches: a fungal leaf spot, caused by wet leaves and still air. Water at the base only, and remove affected leaves.
- Leaves that stay small, tough and very dark: the plant is dry or root-bound. Water more deeply, or move it into a bigger pot.
- The whole plant collapsing overnight with a soft brown centre: crown rot. The surface was wet for weeks. Start again in fresh mix with extra perlite, and water less often.
- Leaves with a bitter, soapy taste: the plant has been stressed and has started to bolt. Cut it right back to 5 cm and let it regrow fresh.
Chapter 6: Bok Choy
Bok choy, also called pak choi, is the quickest of the heading crops and the one that suits a cool shaded balcony perfectly, because it is heat, not shade, that ruins it. Thirty days from sowing to baby leaves, fifty to a full head, and a texture that nothing else in this book can match. Its single weakness is stress: a cold night followed by a warm day, or one dry afternoon, will send it straight up into flower.
What you need
- A 20 to 25 cm deep trough, 45 cm long, holding three plants. Or one 20 cm pot per plant.
- Soilless potting mix, 60 per cent; finished compost, 25 per cent; perlite, 15 per cent.
- Slow-release organic fertiliser at half rate, plus liquid seaweed at half strength every ten days.
- Bok choy seed. Shanghai Green and Baby Pak Choi both stay compact enough for containers.
- A pencil, a label, scissors, a jug, and a torch for slug patrol.
The steps
Bok choy bolts at the first sign of stress. Once the central stalk has shot up, the base goes hollow and the leaves turn bitter, and there is no way back. Sow it where it is going to grow, and do not move it afterwards.
- Fill the trough with the mixed medium and water it with the jug. Let it drain.
- Sow 1 cm deep, 15 cm apart. Tool: a pencil.
- Keep the trough at 18 to 24 C. Germination takes four to eight days. Tool: a maximum-minimum thermometer.
- Thin to one plant per station as soon as the seedlings show true leaves. Tool: scissors. Crowding is a bolt trigger.
- Water steadily and feed at half strength every ten days. Tool: a watering can. Fast, even growth is what keeps bok choy from flowering.
- Turn the trough a quarter-turn every few days so the plants do not all lean towards the same patch of light. Tool: your hands.
The watering rhythm
Bok choy needs the steadiest moisture of any crop here. A pot that swings between bone dry and soaking wet will bolt. In a cool shaded container that means checking every single day and watering little and often rather than soaking once a week. Water in the morning at the base. If the trough is light enough to lift, weigh it in your hand, because weight tells you more than the surface does.
The harvest
- Baby leaves at 30 days, full heads at 45 to 60 days.
- Cut the whole plant at soil level for a head, or take the outer leaves and leave the centre to keep growing.
- Cut in the morning and use it the same day. Bok choy loses its crunch within a few hours of cutting.
- Sow a fresh trough every four weeks from March to September, and one more in late August for an autumn crop that will hold through the first frosts.
What failure looks like
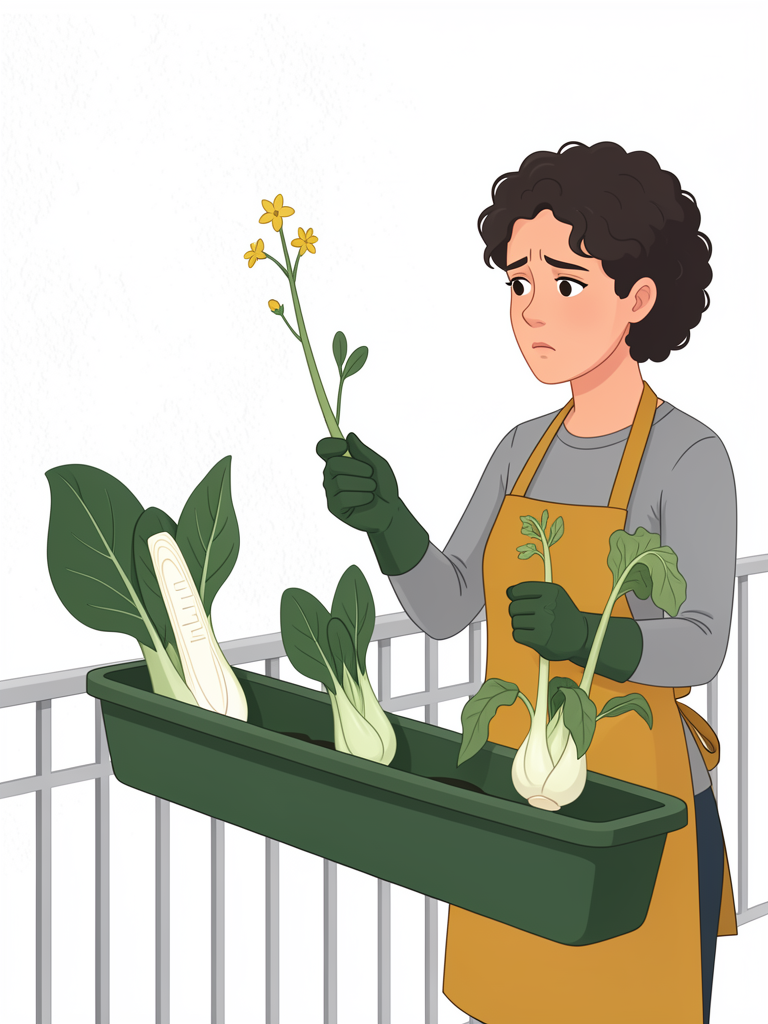
- A tall stalk with yellow flowers and a hollow base: the plant has bolted. Eat what you can, pull it, and resow in a cooler month. Do not try to save it.
- Loose, floppy leaves that never form a solid base: the plants are too close, the light is too low, or you have overfed them. Thin them and stop feeding.
- Slime trails and ragged holes around the base of the stems: slugs. Go out after dark with a torch and pick them off the rim of the pot.
- Wilting in the middle of the day even though the soil is damp: root damage, often from cabbage root fly. Tip the plant out and look at the roots before you water it again.
- Nothing but a thin tuft of leaves after six weeks: the mix is spent or the trough is too shallow. Bok choy roots need depth to swell the base.
- Brown sunken patches on the stems: a bacterial soft rot, usually after a long wet spell. Remove the affected plants and water much less.
Chapter 7: Mizuna
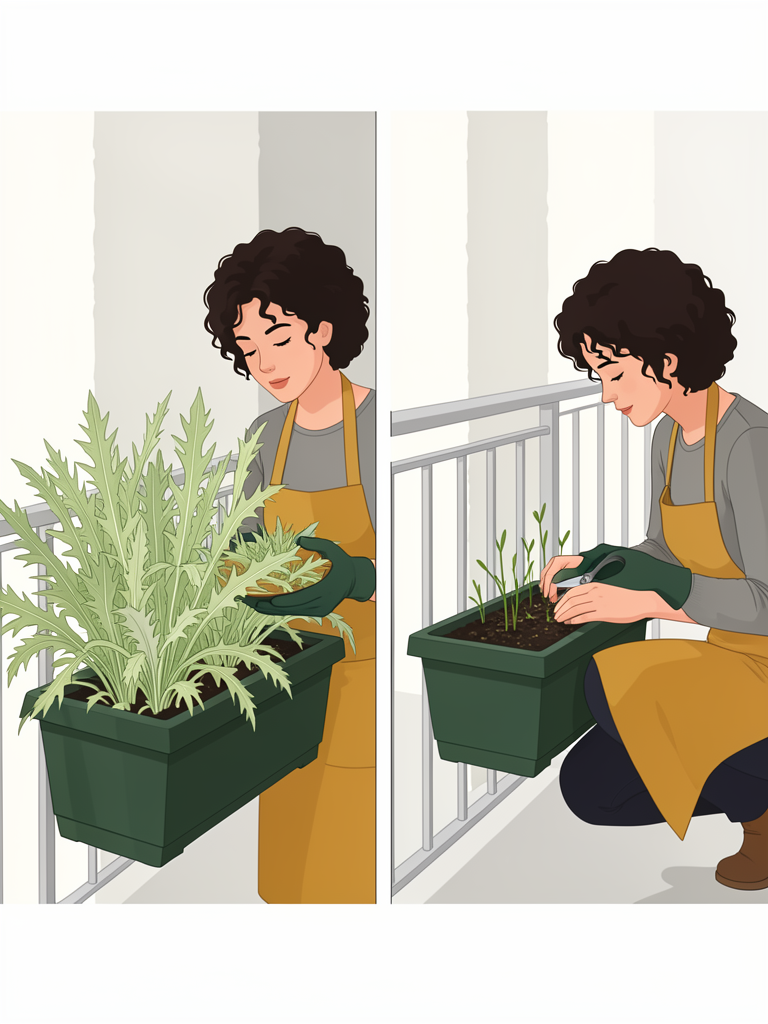
Mizuna is the best cut-and-come-again crop in this book, and the one that keeps a north balcony productive in the coldest months. It is a Japanese mustard green with deeply serrated, feathery leaves, a mild peppery flavour, and an extraordinary ability to regrow from a hard cut. One sowing gives you three or four harvests. It is also the hardiest thing here: a winter sowing on an unheated balcony will sit through light frosts and carry on.
What you need
- A 15 cm deep window box, 60 cm long. Mizuna has a shallow, fibrous root system and does not need depth.
- A lean mix: soilless potting mix, 60 per cent; compost, 25 per cent; perlite, 15 per cent.
- Slow-release fertiliser at a quarter of the label rate. Mizuna is not a hungry plant and too much food makes it soft.
- Mizuna seed.
- A spray bottle, a pencil, a label, a jug and scissors.
The steps
Mizuna is not a single-cut crop. If you pull it up, you lose three more harvests from the same sowing. Always cut it and never pull it.
- Fill the box with the mixed medium, firm it gently, water with the jug, and let it drain.
- Broadcast the seed over the surface, 5 mm deep. Tool: your hand, and a light dusting of dry mix to cover.
- Mist the surface and keep it damp. Germination takes three to five days. Tool: a spray bottle.
- Thin to 8 cm apart when the seedlings are 4 cm tall. Tool: scissors, cutting at soil level. Eat the thinnings.
- Cut the whole box at 8 to 10 cm tall, which is 21 to 30 days from sowing. Tool: scissors, set 3 cm above the surface.
- Sow a new box every three weeks from March to October for a continuous supply.
The watering rhythm
Moderate. Mizuna is the most drought-tolerant salad green here, but a box that dries hard produces spiky, fiercely hot leaves. Water at the base every second or third day in cool weather and daily in summer, when the top centimetre of mix feels dry. Because it is a shallow box, it will dry faster than any of your pots, so check it with a finger rather than a calendar.
The harvest
- First cut at 21 to 30 days, when the leaves are 8 to 10 cm tall.
- Cut the whole box 3 cm above the surface with scissors, then water it and feed it once with half-strength liquid seaweed.
- Expect three or four cuts, each slightly smaller and slightly more peppery than the last.
- A late-summer sowing will stand through light frosts. Below about minus 5 C, cover the box with fleece or bring it against the wall.
- In winter, growth almost stops below 5 C. The plants sit there, alive and unchanged, until the light returns.
What failure looks like
- Small round holes shot through the leaves: flea beetles. On a vigorous box this is cosmetic. Cover with fine mesh if it gets bad.
- A sudden tall stalk with yellow flowers, sometimes within two days of a heatwave: mizuna bolts faster than anything else here. Cut it immediately and resow in a cooler month.
- Seedlings falling over in patches with pinched stems: damping off in a thick broadcast sowing. Sow more thinly, water less, and keep some air moving.
- Translucent, almost glassy pale leaves: the box is too wet. Water less and improve the airflow.
- A box that simply sits there and does nothing for weeks in winter: normal. Below 5 C, mizuna stops rather than dies.
- A tough, hollow, fibrous stem running up through the middle of a cut: the plant is too old. Pull the whole box and resow.
Chapter 8: Parsley
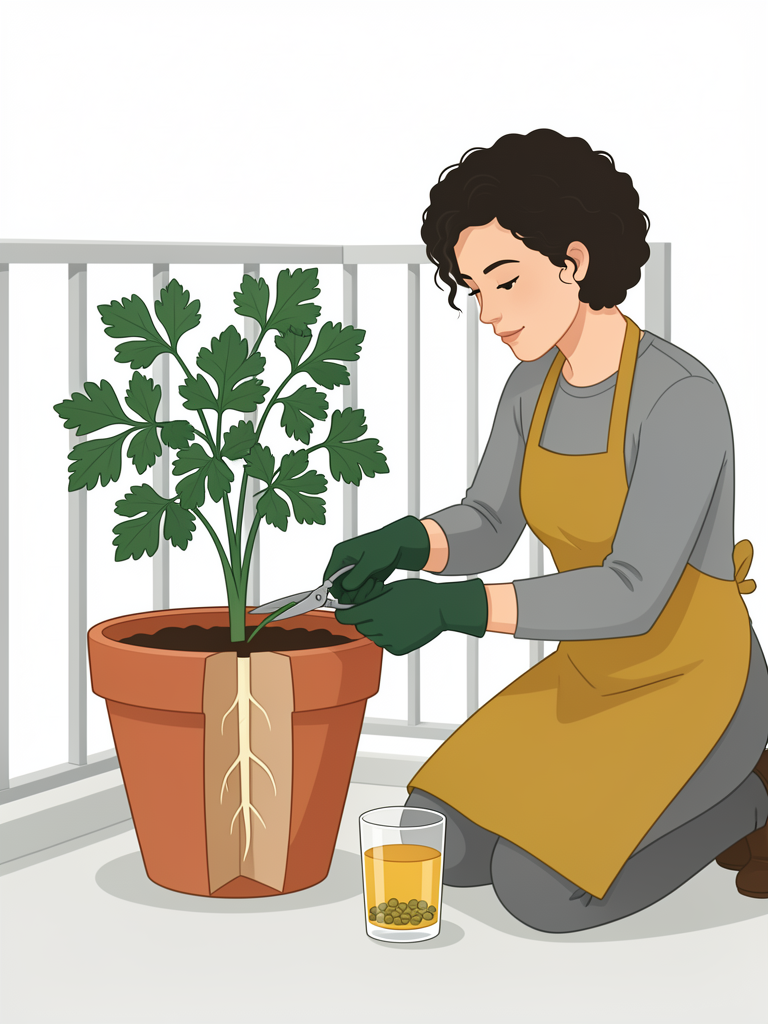
Parsley is the herb that returns the most for the least attention once it has germinated, and the one that tests your patience hardest before that. It is a biennial with a long taproot, so it needs a deep pot, and it is slow enough from seed that most people give up three weeks too early. Get past germination and you will have a plant that gives you a handful of leaves every week for two years.
What you need
- One 25 cm deep pot per plant. Depth is not optional: parsley has a taproot and a shallow pot gives you a stunted plant.
- Soilless potting mix, 60 per cent; finished compost, 30 per cent; perlite, 10 per cent.
- Parsley seed, fresh this year. Parsley seed loses viability quickly, and old seed is the most common reason for an empty pot.
- A small bowl of warm water, a clear plastic bag or a sheet of glass, a maximum-minimum thermometer, and scissors.
- A bright windowsill indoors for the first few weeks. The north balcony is not where parsley germinates.
The steps
Parsley seed can take four to six weeks to come up, and it will not come up at all if the surface dries out even once. If you do not want to wait that long, buy a transplant. There is no shame in it.
- Soak the seed overnight in warm water. Tool: a small bowl. Twelve hours is enough; three days and it rots.
- Fill the pot with the mixed medium and water it with the jug. Let it drain.
- Sow 6 mm deep, three seeds per pot. Tool: the end of a pencil to make shallow holes.
- Cover the pot with a clear plastic bag or a sheet of glass to hold the moisture in. Tool: a bag or a piece of glass. Take it off the moment the first seed sprouts, or you will cook the seedlings.
- Keep the pot at 15 to 21 C and be patient. Germination takes fourteen to twenty-eight days. Tool: a maximum-minimum thermometer.
- Thin to one plant per pot once the seedlings have three true leaves. Tool: scissors, cutting at soil level.
- Move the pot out to the balcony when the plant is 10 cm tall. Tool: your hands, and a saucer underneath.
The watering rhythm
Steady, but never wet. Parsley on a shaded balcony needs less water than you expect, and a pot left standing in a saucer of water will rot at the crown within a fortnight. Water at the base when the top 2 cm of mix is dry, which in cool weather may be every fourth day. If the pot dries out completely, the plant will sulk for two or three weeks and stop producing, so it is worth checking daily even when it does not need water.
The harvest
- Wait until the plant has at least eight stems. That is usually about three months from sowing.
- Cut the outer stems at the base, at the point where they join the crown. Tool: scissors.
- Never cut the centre of the plant. That is where the new leaves come from, and if you take it, the plant stops.
- Parsley is biennial. In its second spring it will run up to flower and the leaves will turn tough and lose their flavour. Keep a new plant coming every year so you are never without one.
- In cold weather, bring the pot indoors or against the wall. Parsley survives light frost but stops growing.
What failure looks like
- Six weeks and nothing has appeared: the surface dried out, the seed was buried too deep, or the seed was old. Start again with fresh seed and a plastic cover.
- Seedlings falling over at soil level with a pinched stem: damping off. Less water, more air, and thin them out.
- A brown, soft patch at the centre of the crown: crown rot from a pot that stayed wet. It is usually fatal. Start again in fresh mix and water less often.
- Yellow leaves, especially in the second year: hunger, or a spent mix. Feed with liquid seaweed. If there is no improvement in two weeks, replace the plant.
- Green and black striped caterpillars eating the leaves: swallowtail butterfly larvae. Most growers plant an extra pot and enjoy them. They will not kill the plant.
- Leaves that are thin, pale and small all season: the pot is too shallow and the taproot has hit the bottom. Move it into a deeper pot next year.
Chapter 9: Mint
Mint is the easiest plant in this book to keep alive and the hardest to keep in its place. It is also the crop that will grow in the darkest corner of your balcony, which makes it valuable: it means that even the spot where nothing else will work can earn its keep. The trick is containment, and the trick is not optional.
What you need
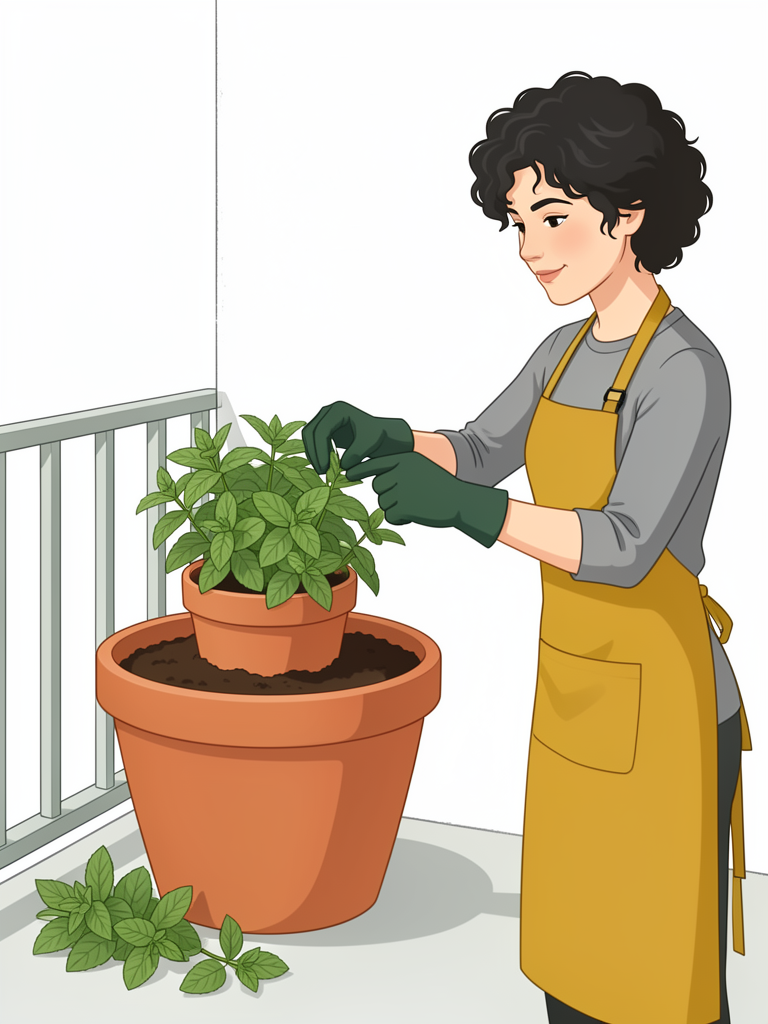
- One 25 cm terracotta pot for the mint itself, and one 35 cm pot or half-barrel to sink it into. Two pots, not one.
- Any decent soilless potting mix for both pots. Mint is unfussy and will grow in poor soil.
- A mint plant, or a supermarket bunch with intact stems.
- A glass of water, a trowel, a jug, and scissors.
The steps
Never plant mint in a shared container, and never tip it into open ground. Its runners travel just under the surface and it will come up in every pot within reach, including the ones on the other side of the balcony.
- If you are starting from a supermarket bunch, strip the lower leaves, stand the stems in a glass of water on a windowsill, and wait seven to fourteen days for roots. Tool: a glass. Change the water every second day.
- Fill the smaller pot with mix, leaving 3 cm of rim, and plant the rooted cutting or bought plant into it. Tool: a trowel.
- Fill the larger pot with plain mix, leaving a hollow in the middle the size of the smaller pot.
- Sink the smaller pot into the larger one until its rim sits 2 cm above the surface of the outer mix. Tool: your hands. That rim is the barrier: any runner that tries to leave the inner pot meets air and stops.
- Water the inner pot thoroughly with the jug, and the outer pot only enough to settle the mix.
- Pinch out the growing tips every week to keep the plant bushy. Tool: your thumb and forefinger. Pinch just above a pair of leaves and the plant will branch from that point.
The watering rhythm
Mint is the thirstiest plant here. Even in shade it wants a damp pot. Check it every day in summer and every second or third day in spring and autumn, and water when the surface feels barely damp rather than bone dry. Mint is the one plant in this book that forgives a wet pot more readily than a dry one. A mint that wilts hard will drop most of its leaves and take weeks to recover.
The harvest
- Start pinching when the plant is 15 cm tall. The tips are the best part and every pinch makes the plant fuller.
- Take no more than a third of the plant at a time.
- Harvest before it flowers for the strongest flavour. If it flowers anyway, cut the whole plant back by half and it will come again.
- Mint dies back to the ground in winter while the roots survive. Bring a pot indoors before the first hard frost if you want leaves through the winter.
- Every second spring, tip the plant out, cut the rootball in half with a knife, and replant one half in fresh mix. Give the other half away.
What failure looks like
- Bright orange or rusty pustules on the undersides of the leaves: mint rust. Strip the affected leaves, cut the plant back hard, throw the cuttings in the bin rather than the compost, and stop watering the leaves.
- Long bare stems with all the leaves at the top: the plant is stretching for light in too dark a corner. Pinch it hard, or move the pot.
- The whole plant collapsed in a single day: the pot dried out. Cut it back by two-thirds, water it well, and it will usually return.
- A dense mat of pale runners with almost no leaves: the pot is root-bound. Divide it as described above.
- A white powdery coating on the leaves: powdery mildew, from still, humid air. Thin the stems and improve the airflow around the pot.
- Mint appearing in the pots on either side of it: the barrier has failed. Lift the sunken pot out, cut away every runner outside it, and check that the rim is still above the soil line.
Chapter 10: Scallions
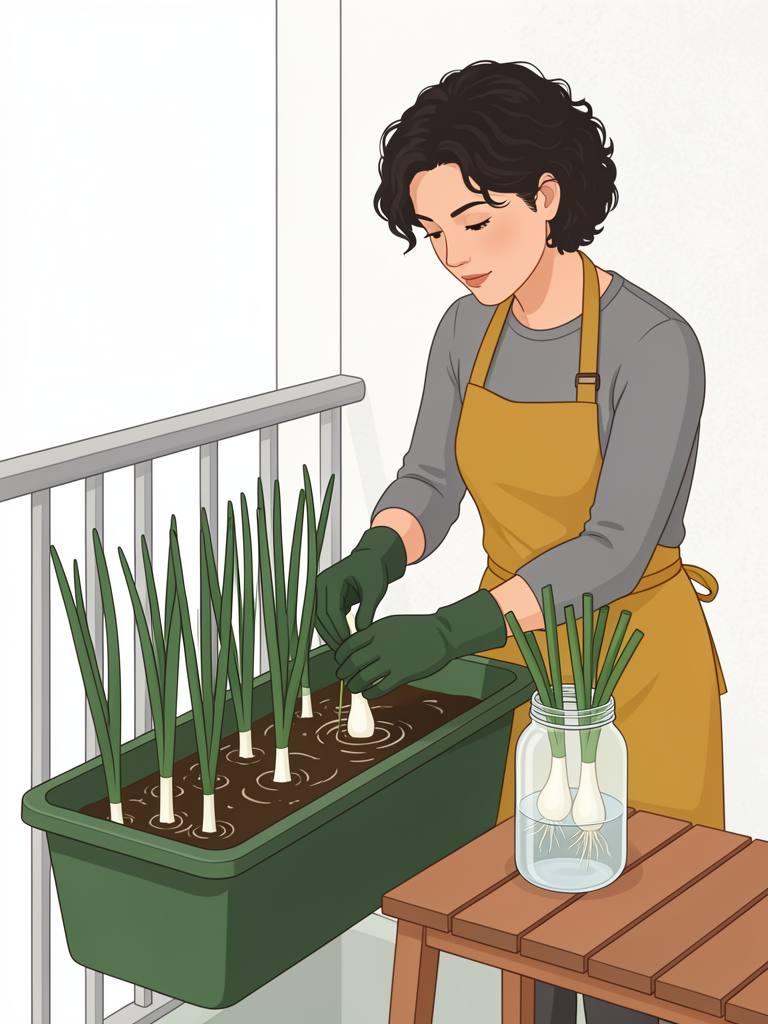
Scallions, or bunching onions, are the crop that proves a north balcony can produce something you actually use every day. They are grown for their green stems rather than their bulbs, which means they follow the rule of the leaf, and they are shallow-rooted enough to grow in the kind of trough that would starve a kale. They are also the only crop in this book with a shortcut: the root ends of a bunch from the shop will regrow in damp mix within a week.
What you need
- A 15 to 20 cm deep trough, 45 cm long, or any wide shallow pot. Scallions are shallow-rooted and hate a pot that dries out.
- Soilless potting mix, 65 per cent; finished compost, 20 per cent; perlite, 15 per cent.
- Scallion seed, or a bunch of shop scallions with the white root ends left intact.
- A glass of water, a spray bottle, a jug, scissors, and a pencil.
The steps
Scallions have shallow roots, and a shallow container dries out faster than any other pot on the balcony. If you miss a day in July, you will come home to a trough of flat grey ribbons. A self-watering trough, or a piece of capillary matting under the pot, solves this problem completely and is worth the money.
- Fill the trough with the mixed medium and water it with the jug. Let it drain.
- Either sow seed 1 cm deep and 5 cm apart, or push shop-bought root ends 2 cm into the damp mix, 5 cm apart. Tool: your finger.
- Mist the surface. Tool: a spray bottle. Do not water root ends in with a can; a hard stream will wash them straight out again.
- Seed germinates in ten to fourteen days at 15 to 20 C. Tool: a maximum-minimum thermometer. Root ends need no germination at all and will show new green within a week.
- Thin the seedlings to 5 cm apart once they are 5 cm tall. Tool: scissors, cutting at soil level. Crowded scallions never thicken.
- Harvest the outer plants first, or cut 3 cm above the base and let them regrow. Tool: scissors.
The watering rhythm
Little and often. Check the trough daily in warm weather and every second day in cool weather. Water at the base until the water just reaches the surface, and never let the trough dry out completely. If it sits in a saucer, empty the saucer twenty minutes after watering. Because the trough is shallow, the bottom centimetre is doing most of the work, and that is the part that dries first.
The harvest
- Seed-sown scallions are ready to pull at eight to twelve weeks.
- Root ends pushed into mix are ready to cut in three to four weeks.
- Pull every other one to leave room for the rest, or cut at 3 cm above the base and let them come again two or three times.
- Cut before the flower stalk hardens. Once the central stalk goes woody, the whole stem is unpleasant.
- Sow a new trough every six weeks from early spring to late summer for a supply that runs almost all year.
What failure looks like
- Scallions that never get thicker than a pencil lead: they are too crowded, and on a north balcony they will always be slimmer than the ones in the shop. Sow more and use them by the bunch.
- A hard central flower stalk: the plant has bolted after a cold snap or a dry spell. Cut the stalk and use it; chopped into a pan, it is perfectly fine.
- Seedlings rotting at the base in a cold wet trough: damping off. Sow thinner, water less, and wait until the soil is warmer before the next sowing.
- Grey or brown rot at the base of the stems with a bad smell: soft rot from water standing in the trough. Empty the saucer, water less often, and start a fresh trough.
- A trough of flat grey ribbons: it dried out. Most scallions will recover if you water them and cut them back by a third.
- Nothing at all after two weeks: the mix dried out, or the seed was sown too deep. Resow at 1 cm and keep the surface misted.
The Year on a North Balcony, and What Went Wrong
A north balcony does not follow the same rhythm as a sunny garden. It has two peaks, in spring and again in autumn, a difficult stretch in midsummer when the heat arrives without the light to match it, and a slow but genuinely useful winter. Once you understand that shape, you stop fighting it and start sowing for it.
The year, month by month
These dates assume a temperate climate in the northern hemisphere, with frost between November and March. Shift everything by six months if you garden south of the equator, and by a few weeks either way if your winters are milder or harder than that.
- January. Nothing grows outdoors except the overwintered chard, kale and parsley. Order seed, wash last year's pots, and mix fresh medium for the season ahead.
- February. Start parsley indoors on a bright windowsill, and start mint from supermarket stems in a glass of water. Do not sow anything on the balcony yet.
- March. First sowing of lettuce, arugula and mizuna, under a clear cover if you have one. Spinach goes in under cover too. The soil needs to be above 5 C for lettuce to germinate and above 10 C for it to grow.
- April. The main lettuce sowing. Bok choy and scallions go in. Kale transplants move out into their final pots.
- May. Sow arugula and mizuna every fortnight from now on. Watch for the first aphids in the newest leaves, and put out sticky yellow traps as a warning system.
- June. The long days help even a north balcony, so this can be a surprisingly good month. Keep water steady and watch the pots nearest a warm wall, which dry out first.
- July. The hardest month. Lettuce bolts, spinach refuses, and arugula turns ferocious. Lean on chard, kale and mint, keep sowing arugula in your coolest zone, and keep the water even.
- August. Start the autumn sowings: lettuce, spinach, mizuna and arugula sown now will carry you into December. This is the most important sowing month of the year on a north balcony.
- September. The best month for spinach. Sow it thickly and keep the pots cool and damp. Bok choy sown now will head up beautifully in the cooling weather.
- October. Last sowing of arugula and mizuna. Move mint and parsley indoors before the first frost. Put fleece over anything you want to keep cropping.
- November. Harvest from the autumn sowings. Chard and kale keep going; cover the pots with fleece on cold nights. Growth slows to a crawl.
- December. Harvest chard, kale and parsley, and plan next year. Write down what worked and what bolted, because you will not remember in March.
What you see, and what to do about it
- Tall pale stems, tiny leaves at the top and big gaps between them. Not enough light, and no fertiliser will fix it. Move the pot to a brighter zone, or harvest as baby leaves and resow.
- Leaves yellowing from the bottom upwards. Nitrogen shortage in an old mix. Feed with liquid seaweed and plan to refresh the medium next season.
- Older leaves yellow between the veins while the veins stay green. Magnesium shortage, very common in peat-based container mixes. Spray with Epsom salts at one teaspoon per litre in the evening, and repeat in a fortnight.
- Brown, papery edges on lettuce leaves. Tipburn, caused by uneven watering rather than disease. Water more evenly, bottom water, and stop feeding.
- A sour smell, brown mushy roots, and a plant that collapses. Root rot from overwatering in a cool dim pot. Repot into fresh mix with extra perlite, water less, and lift the pot on feet.
- Green slime on the surface of the soil. Algae, which is a sign of constant wetness rather than a problem in itself. Scrape it off and let the top centimetre dry.
- A tall stalk shooting out of the middle of a leafy plant with small flowers. Bolting, triggered by heat, cold, or a dry pot. Cut it and eat it, then resow in a cooler month.
- Sticky clusters of small insects in the growing tip. Aphids. Spray with soapy water, repeat every three days, and remove the worst leaves.
- Yellow patches on top of a leaf with grey fuzz underneath. Downy mildew. Increase the spacing, water the soil rather than the leaves, and remove affected leaves at once.
- Orange powdery pustules on the undersides of mint leaves. Mint rust. Strip the affected leaves, cut the plant back hard, bin the cuttings, and water at the base.
- Blotchy papery tunnels running across chard or spinach leaves. Leaf miner. Squash the grub at the end of the tunnel with your thumb, or remove the leaf.
- Nothing has germinated after two weeks. The seed was buried too deep, the surface dried out, or the mix was too cold. Check the depth, water from the base, and check the maximum-minimum thermometer.
- Seedlings toppling over at soil level with a pinched stem. Damping off. More airflow, less water, thinner sowing, and always fresh mix.
- Narrow seedlings with long gaps between the leaves, all leaning the same way. Not enough light from the start. Move them, or accept baby-leaf harvests.
Ten varieties that work in shade
- Lettuce: Salad Bowl, Red Sails, Sylvia, or any cut-and-come-again mix.
- Spinach: Bloomsdale, Winter Giant, Perpetual.
- Arugula: Astro, or standard wild rocket if you like it hot.
- Kale: Dwarf Curly Scarlet, Red Russian, Nero di Toscana.
- Swiss chard: Bright Lights, Fordhook Giant.
- Bok choy: Shanghai Green, Baby Pak Choi.
- Mizuna: any standard green mizuna; the red types are slower but prettier.
- Parsley: Giant Italian for flavour, Moss Curled if you want it to look like the pictures.
- Mint: spearmint for cooking, Moroccan mint for tea.
- Scallions: White Lisbon, Evergreen Hardy White.
A last word
Start with three containers, not ten. One window box of loose-leaf lettuce, one deep pot of chard, and one pot of mint will teach you almost everything this book can teach you about water, light and weight, and they will give you a bowl of leaves within five weeks. Add a crop each season as you learn how your own balcony behaves, because every balcony is slightly different: the one above yours casts a shadow at four in the afternoon, the wall behind yours holds heat, the wind comes round the corner in a way nobody predicted.
The reward for that patience is modest and completely reliable. On the darkest, greyest, most unpromising balcony in the building, you can grow food that you actually eat, every week, for most of the year. You do it by following one rule: grow the leaf, not the fruit. That is the whole secret, and now you have the rest of it as well.